How to Clean Leather Shoes: A Shoemaker’s Guide to the Right Tools, Steps, and What to Avoid
Leather shoes pick up dirt little by little, with every wear.
Regular care is essential — if you want to keep on wearing them for years.
But if you start the work when you are unsure of what to use, you can damage the surface of the leather, or even leave behind stains and discoloration that you will never be able to undo.
In this article, I'll show you which areas need the most care. I will introduce the tools that you will need for cleaning your shoes, and also show you the steps to clean your leather shoes — as well as what you should never use.
The Three Areas to Focus On When You Clean Leather Shoes
When you clean leather shoes, there are three main areas to keep in mind.
- The upper
- The lining (the internal material)
- The sole
Of all the things we wear, leather shoes are worn in some of the harshest conditions.
The sole carries our weight and rubs against the ground with every step we take. The upper collects dust and grit from the air, and muddy water soaks into the shoes on rainy days.
A pair of feet can excrete about a cup of sweat a day, and the shoe linings absorb most of the moisture.
Each of these three areas has its own kind of trouble. So each one needs its own tools and steps to stay clean.
Cleaning the Upper
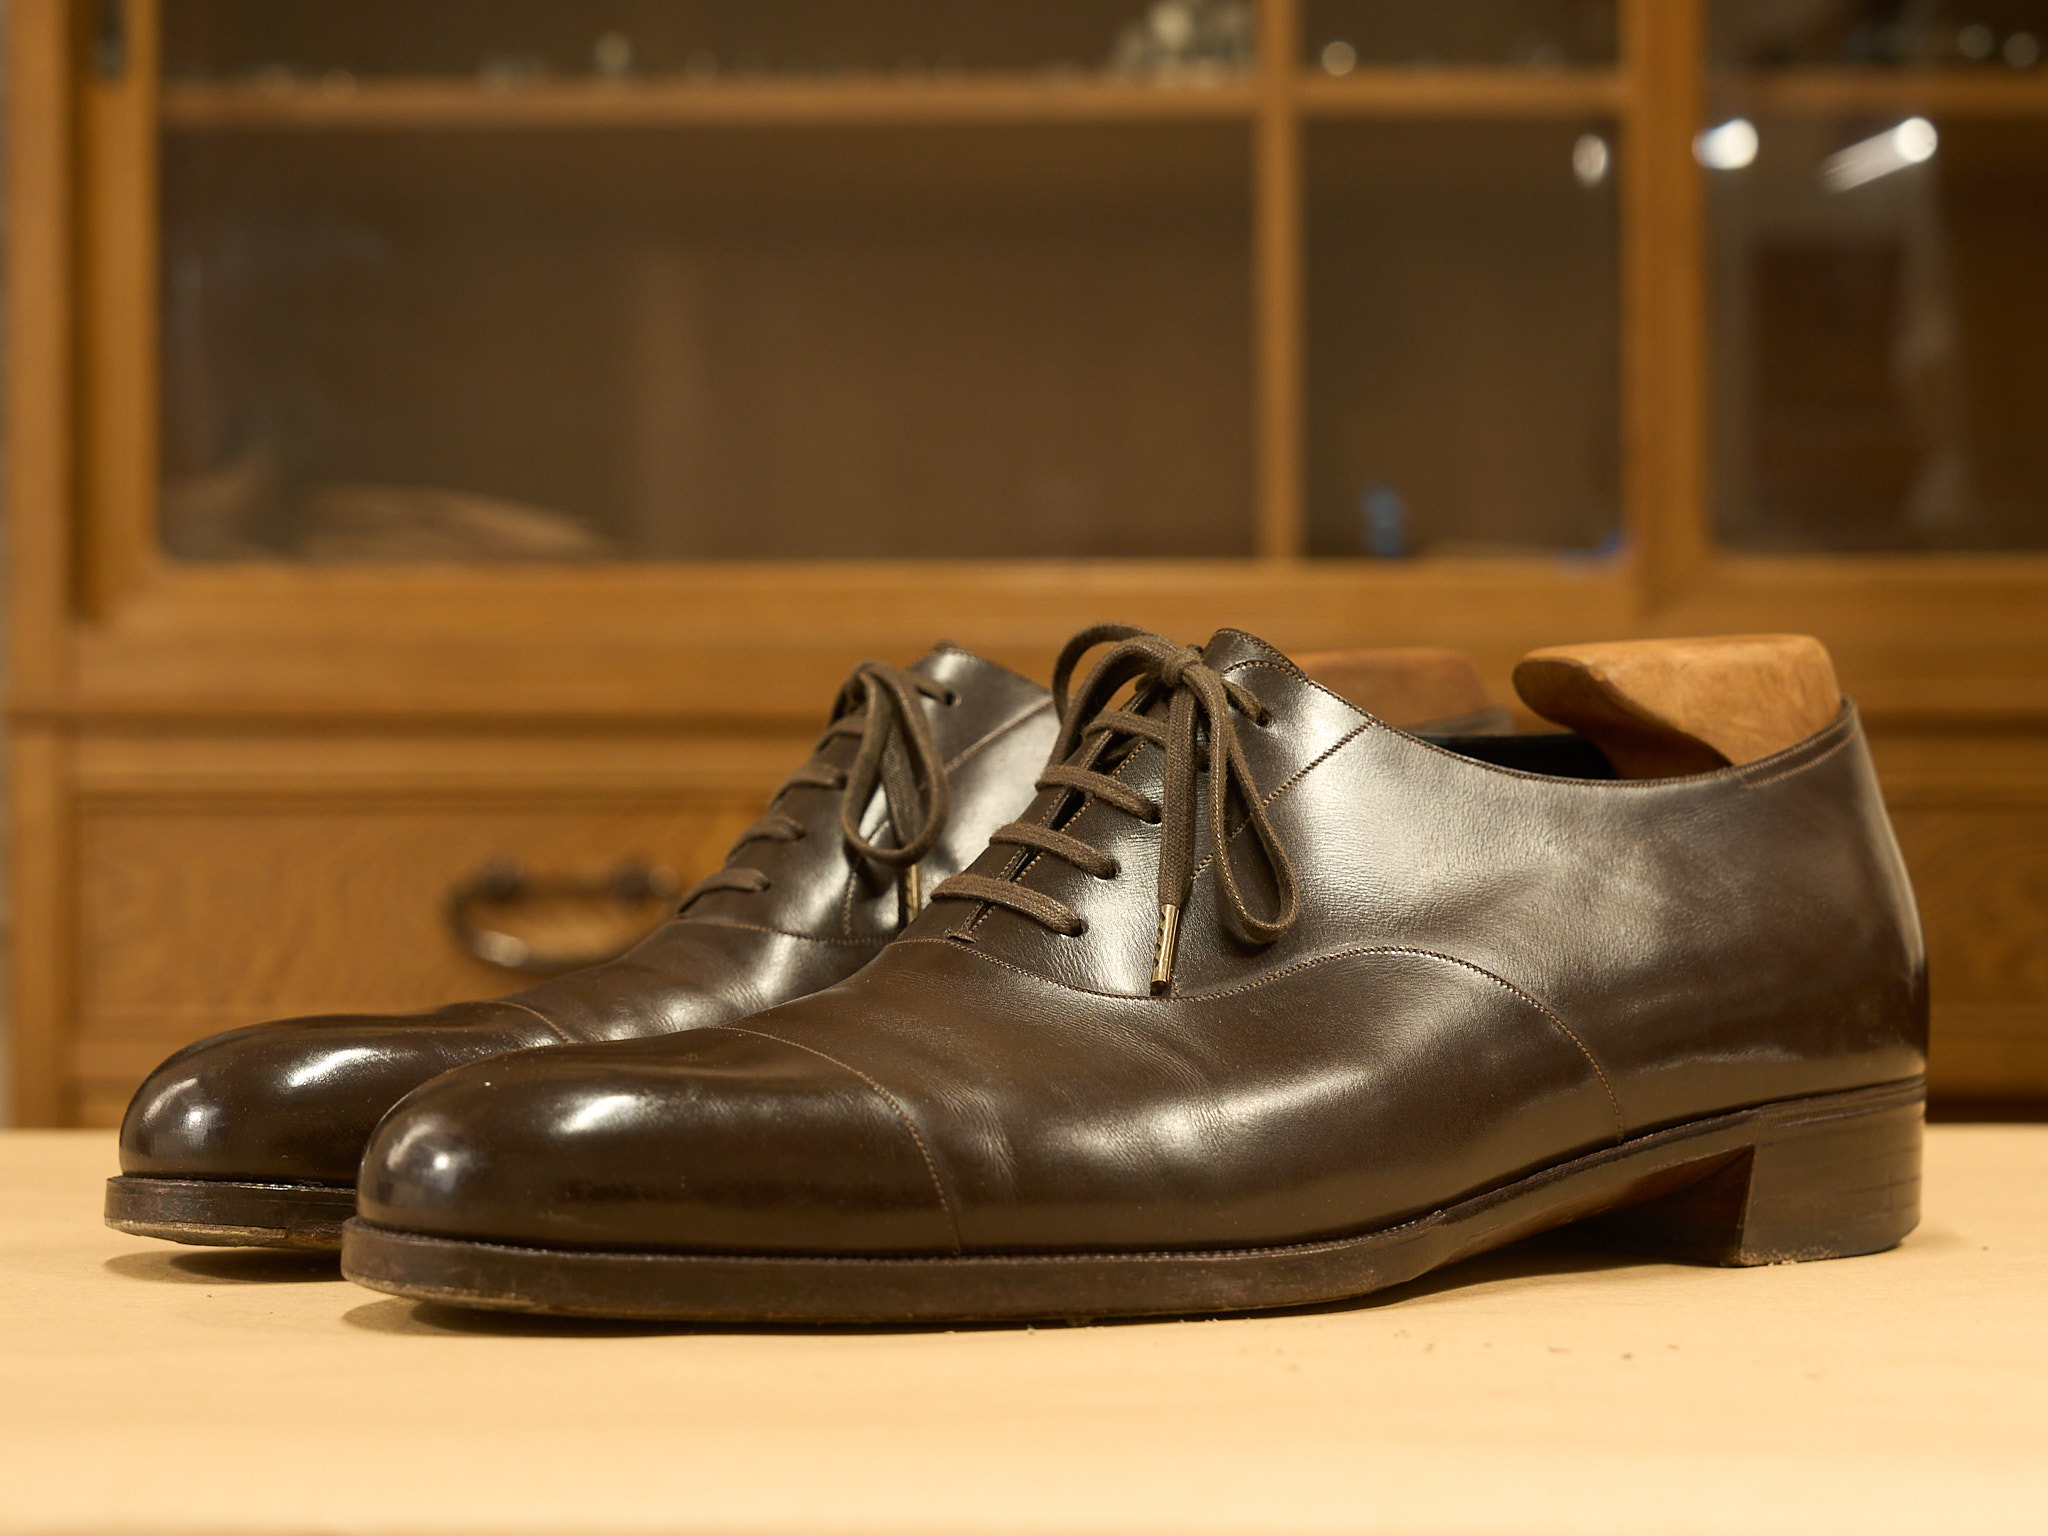
The upper of the shoe is the part you see most. Dust and grit show clearly here.
When dirt builds up on the surface, the leather loses its natural oils and dries out. The color goes flat, and fading starts to show.
If it dries out too much, cracks will form where it bends. Once a crack runs deep, it goes beyond what cream can repair. From there, it will be difficult to recover.
Keeping the upper shoe clean is not only about looks. Upper shoe care lets you wear the shoes for years.
Tools You'll Need
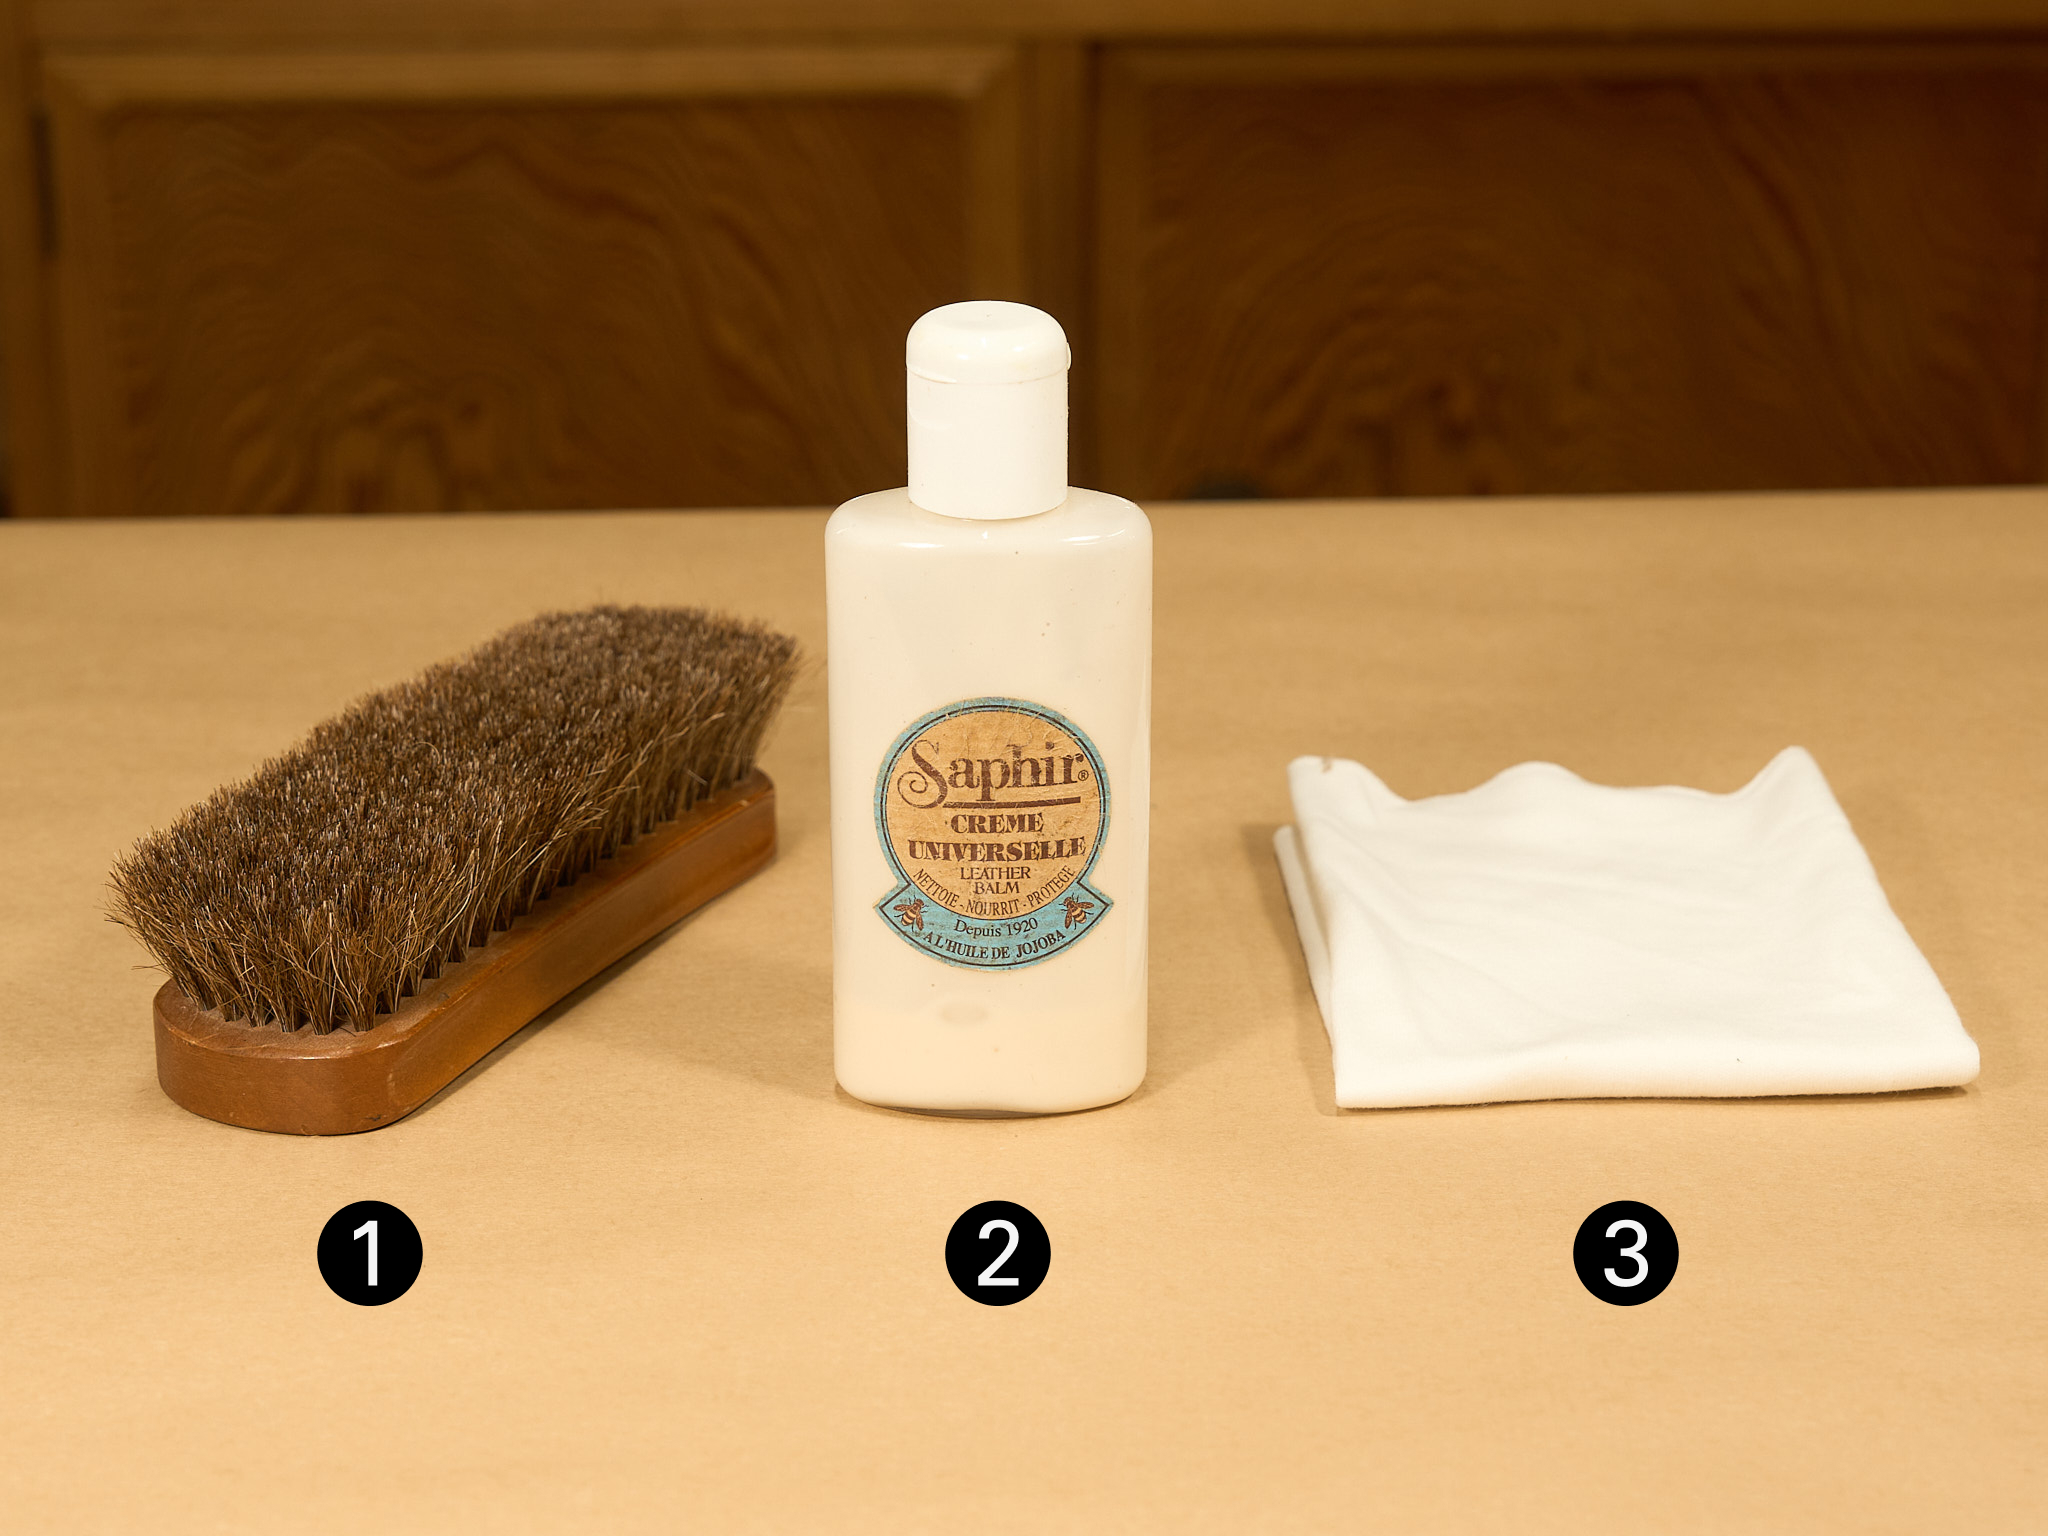
1. Horsehair Brush
Use it to sweep dust and dry dirt off the surface of the upper.
2. Leather Lotion
Leather lotion lifts the dirt and old cream that the horsehair brush can't reach, and feeds oil and moisture back into the leather.
In this article, I'm using Saphir Noir leather lotion.
It cleans, conditions the leather, and adds shine — all in one.
It spreads easily, works on any color, and is highly versatile. If you can't decide which leather lotion to choose, give it a try.
3. Cloth
Use a cloth to apply the lotion to the leather and wipe the dirt away.
A soft cotton cloth works best. An old T-shirt cut into a cloth will do.
Now let me walk you through the steps, using these tools.
Step 1: Brush Off the Dust with the Horsehair Brush
First, take out the laces so they don't get in the way. Then use the horsehair brush to sweep the dust off the whole upper.
Dust gathers around the welt — the seam between the upper and the sole — and along the stitching. Work the brush especially in these areas.
Get off as much dirt as you can. It will help the lotion sink into the leather in the next step.
Step 2: Apply the Leather Lotion
Put the lotion onto the cloth and spread it over the whole upper shoe. You will need about a dime- to quarter-sized amount of lotion.
Don't scrub too hard. Spread it gently.
You will not be able to cover it all in one pass. Put the lotion onto the cloth two or three times and work the lotion evenly over the whole surface.
The creases gather dirt, and they dry out and wear faster than the rest. Work the lotion down into the fine creases, following the direction of the lines.
Once the whole upper is covered, let it dry for two or three minutes.
Step 3: Buff with a Dry Cloth
Use a clean and dry side of the cloth to wipe off the excess lotion.
A gentle dry buff leaves a thin film behind, and you can restore the shine of the leather.
Don't press hard. Wipe the whole shoe quickly and evenly. Lotion tends to remain in the creases, so buff along the direction of the crease.
Lace the shoes back up, and you're done.
Cleaning the Lining
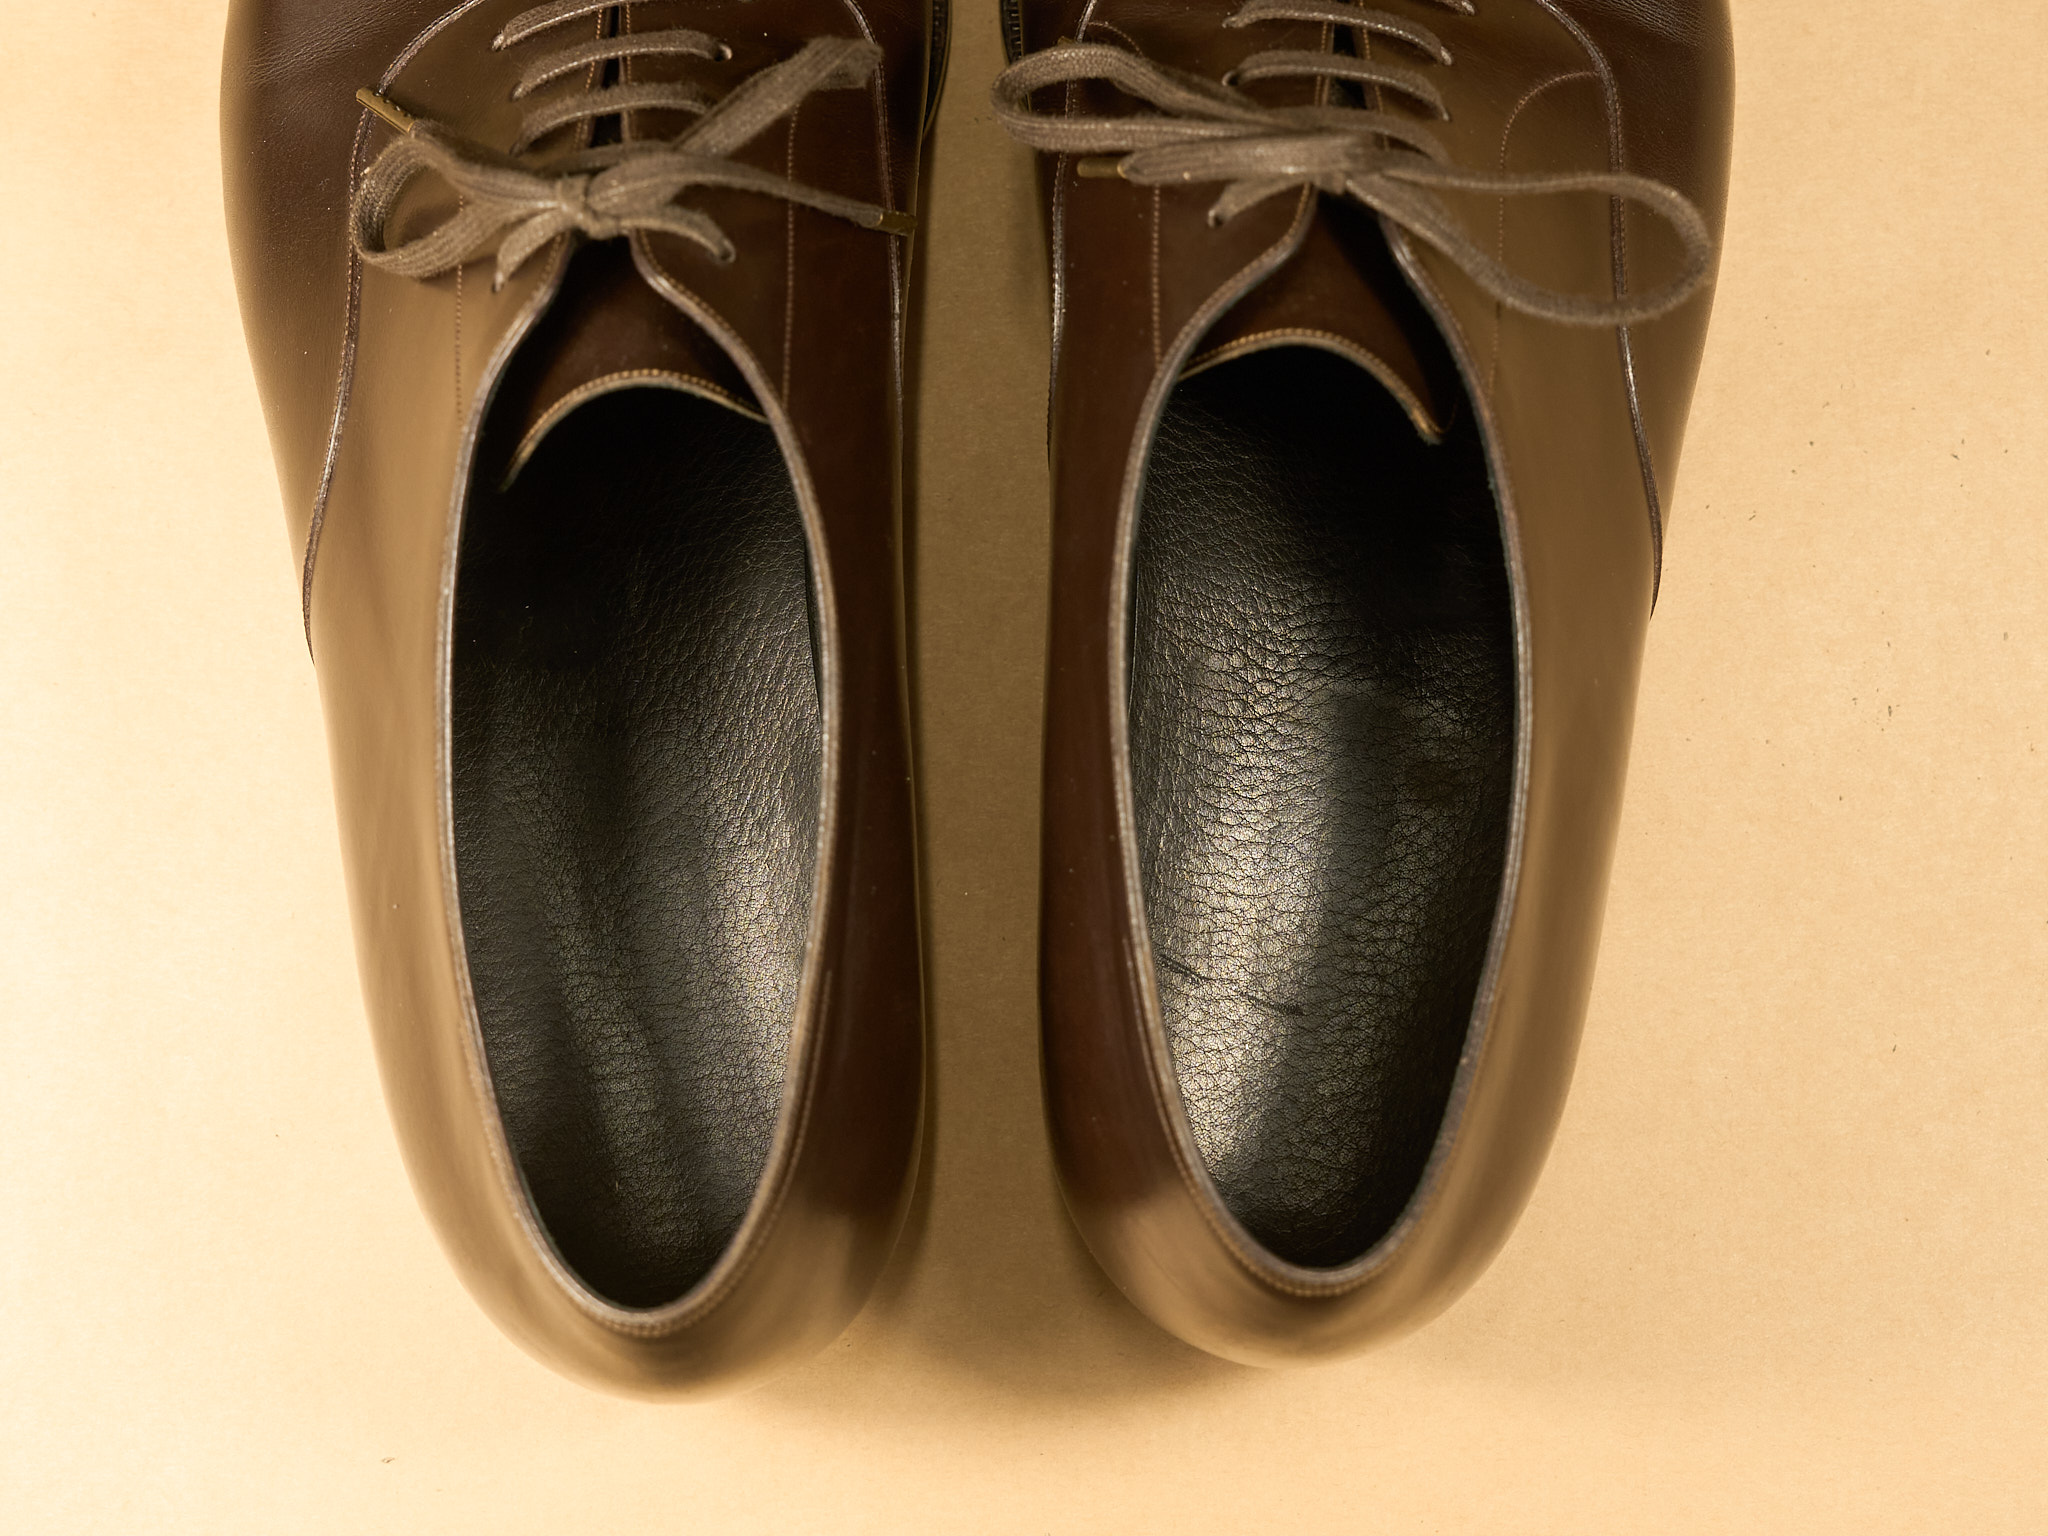
Shoe care for the lining — the inside of the shoe — is not just to make it look better. It is necessary to prevent and remove odor.
The lining absorbs the sweat, oil, and moisture from your feet. If you leave it, bacteria will grow and cause odor.
Once the odor sets in, it will take time to remove. Regular care can keep the shoes odor-free.
Linings come in two forms: leather and fabric. In this article, I'll focus on the leather lining common in men's dress shoes.
Tools You'll Need
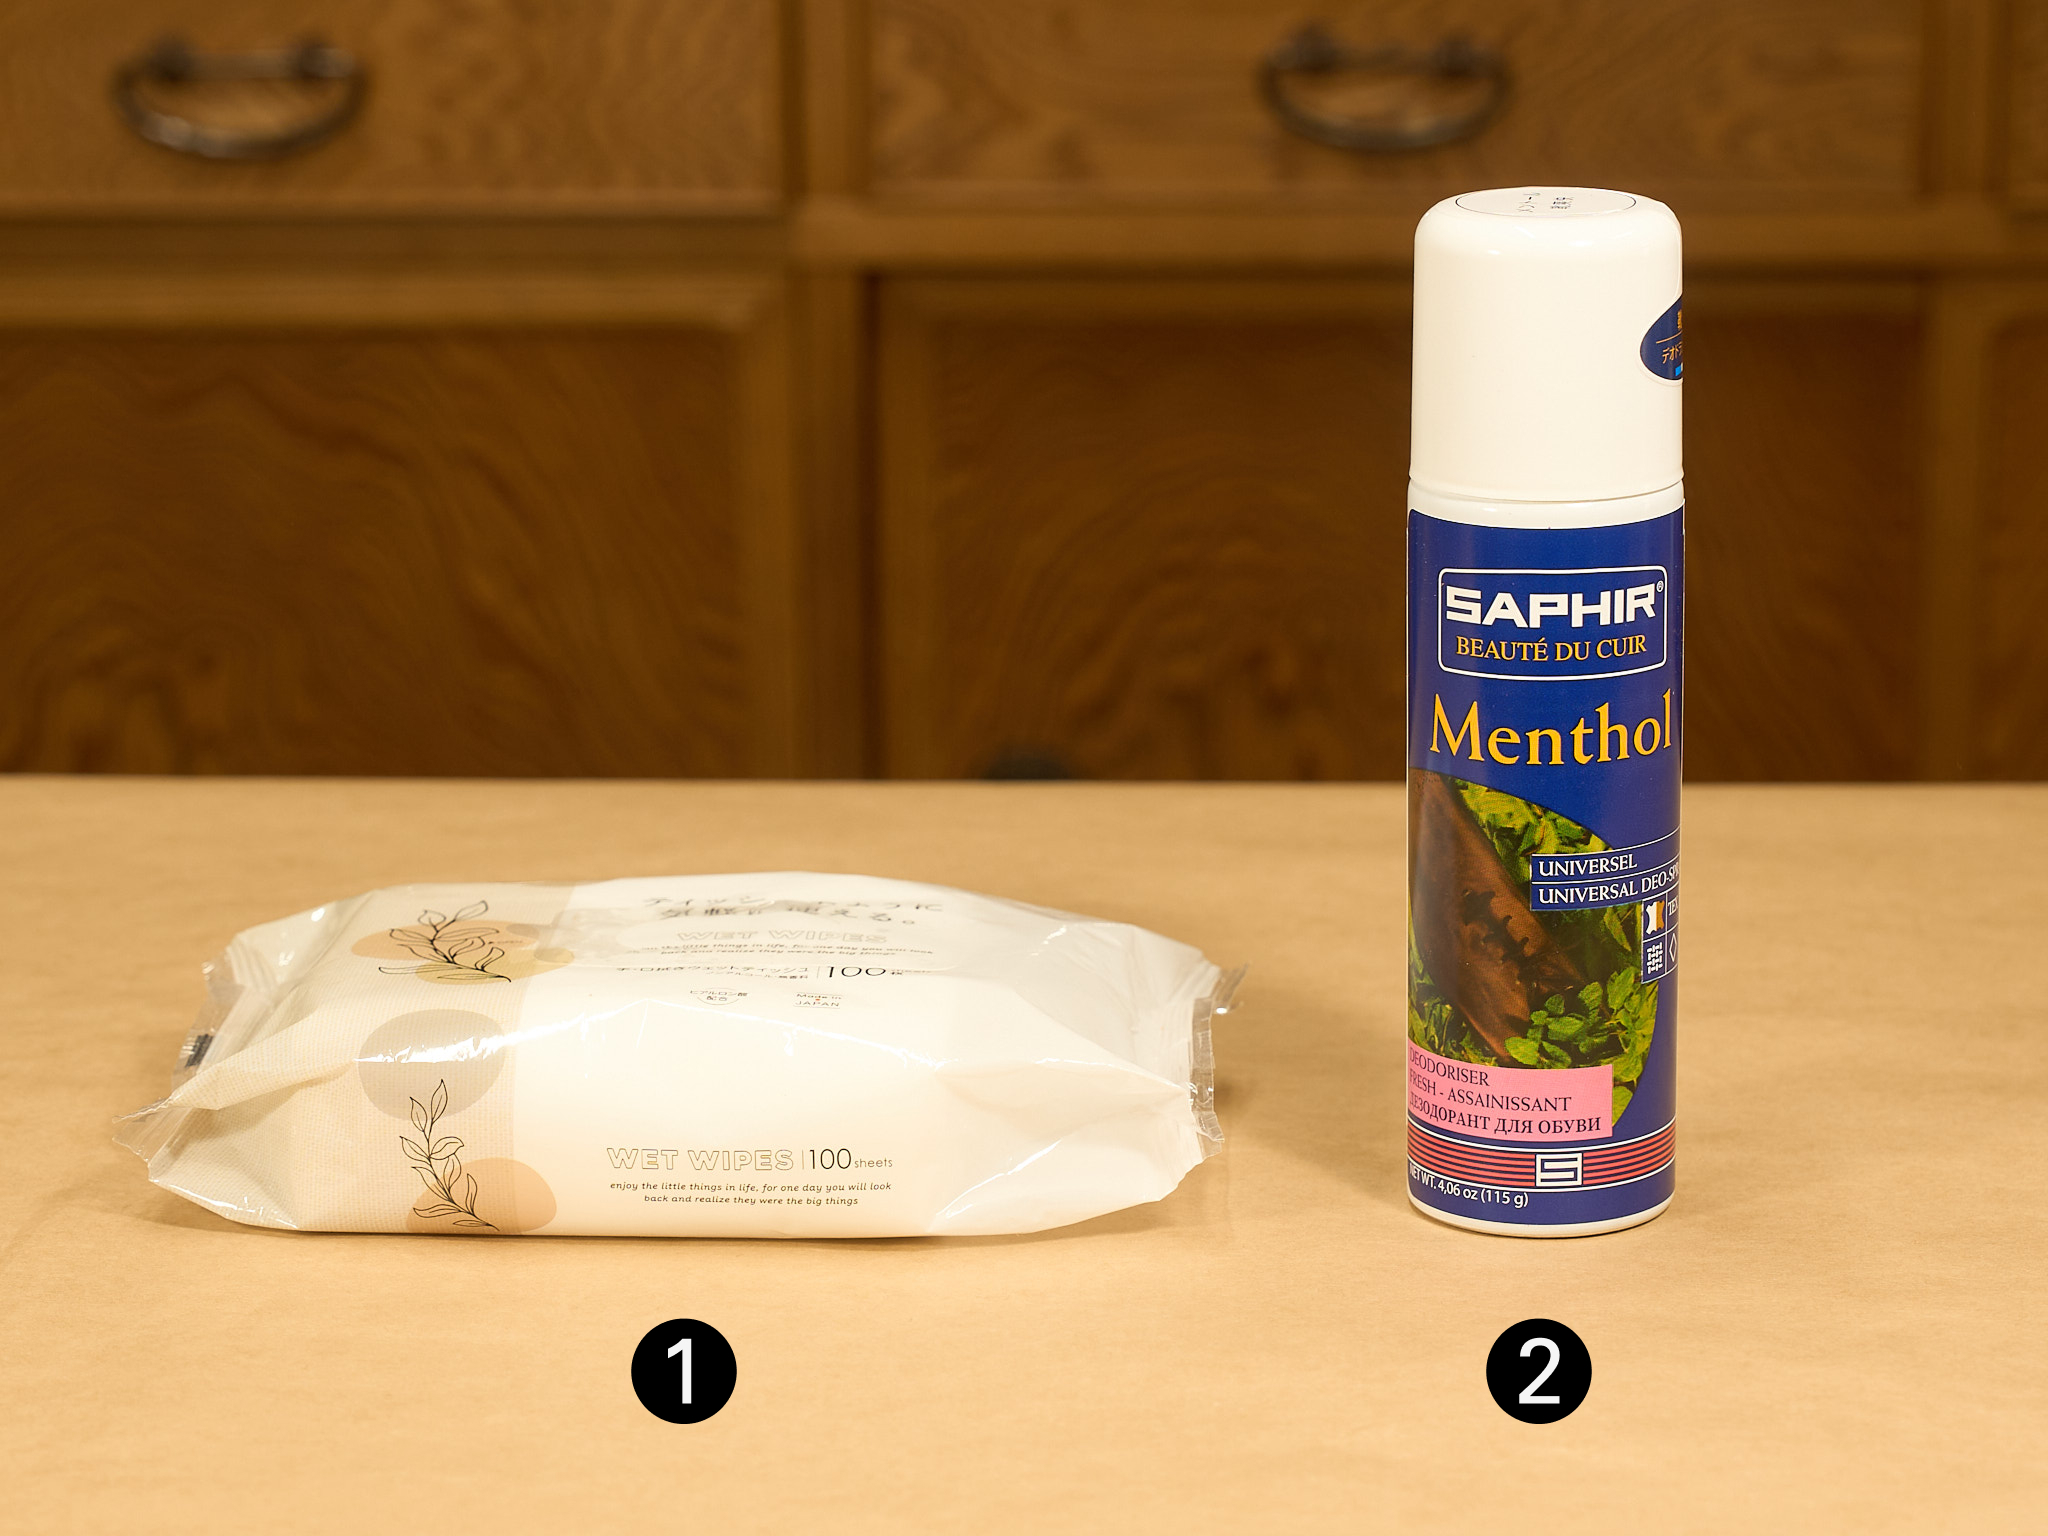
1. Sanitizing Wipes
Prepare some sanitizing wet wipes. The wipes don't need to be solely for leather.
2. Deodorant Spray (only if the odor bothers you)
If the odor bothers you, add a deodorant spray to the wipes.
In this article, I'm using Saphir menthol deodorant spray.
Step 1: Wipe the Lining with the Sanitizing Wipes
Wipe the lining clean with the sanitizing wipes.
Wipe the entire inner shoe — the heel counter and the insole included.
The tip of the toe is easy to miss. Reach your hand deep into the shoe and wipe as much as you can.
Step 2: Spray the Deodorant (only if the odor bothers you)
Spray the deodorant. Once you've sprayed, let it dry for about fifteen minutes.
If the odor doesn't go away in one spray, spray it regularly. The smell will fade over time.
This will work best for the lining.
Cleaning the Sole
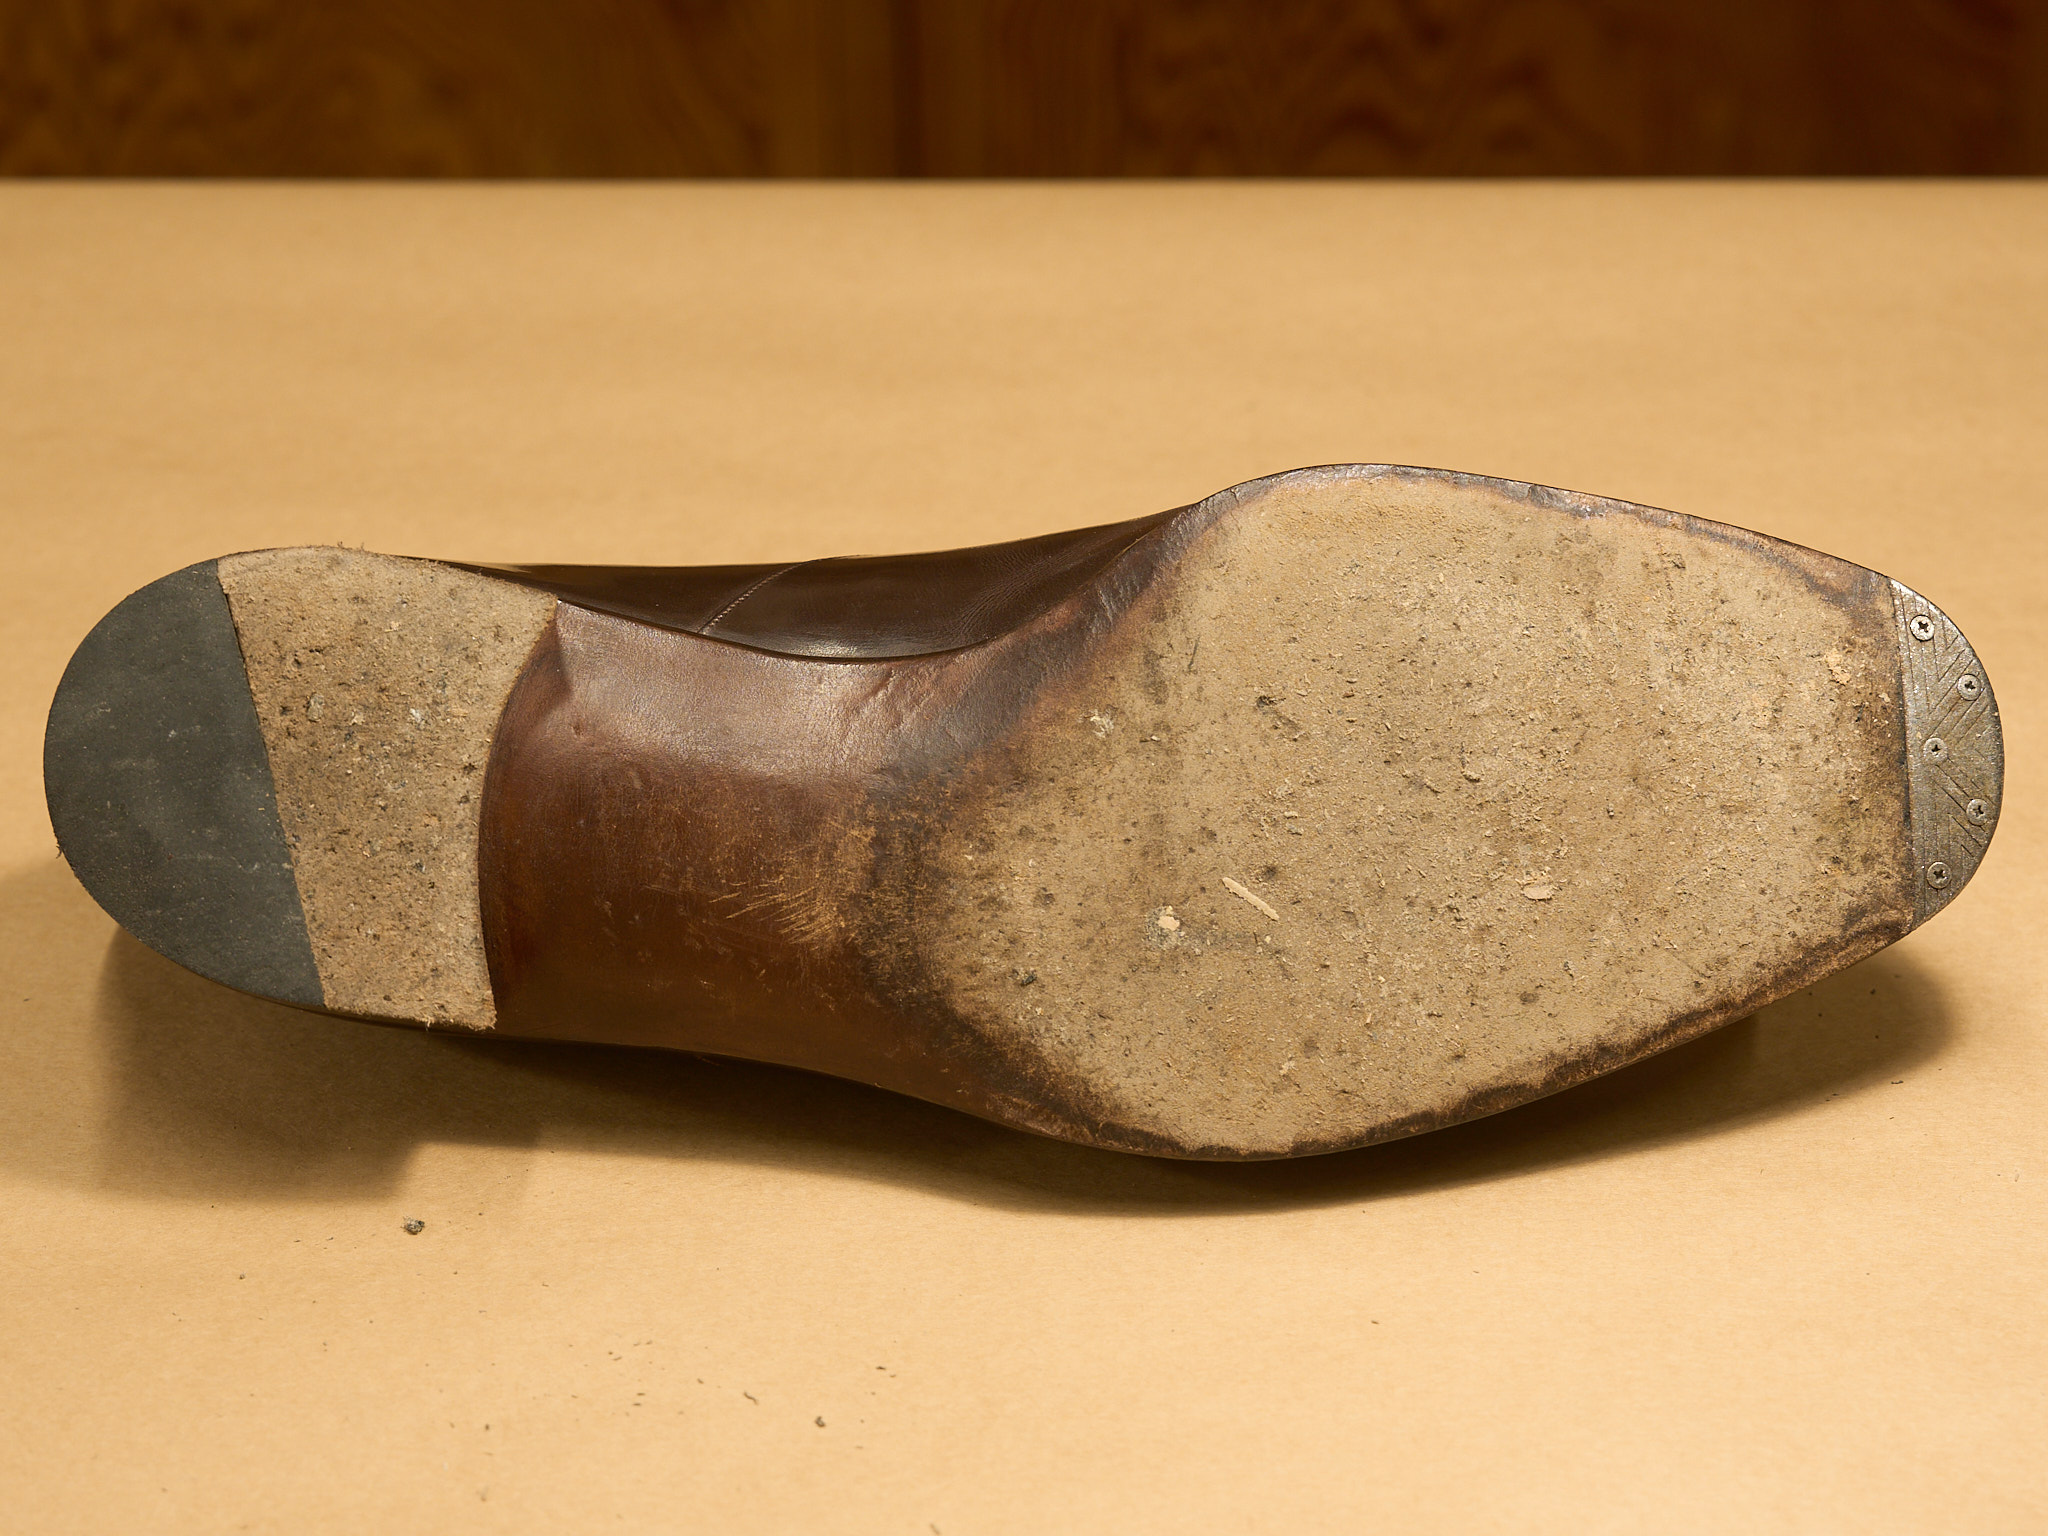
The sole is the part that touches the ground directly.
By wearing the shoes, the mud and grit are bound to stick to the soles. So you may not feel much need to clean the soles for looks.
Leather soles can lose their flexibility from a lack of oil, which wears down and cracks more easily. It will also absorb water, which leaves water spots inside.
For shoe care to make shoes last longer, cleaning the sole on a regular basis is important.
You will not have to do it as often as cleaning the upper shoe or the lining. But be sure to keep an eye on the sole, and if it looks dry, follow the care below.
Tools You'll Need
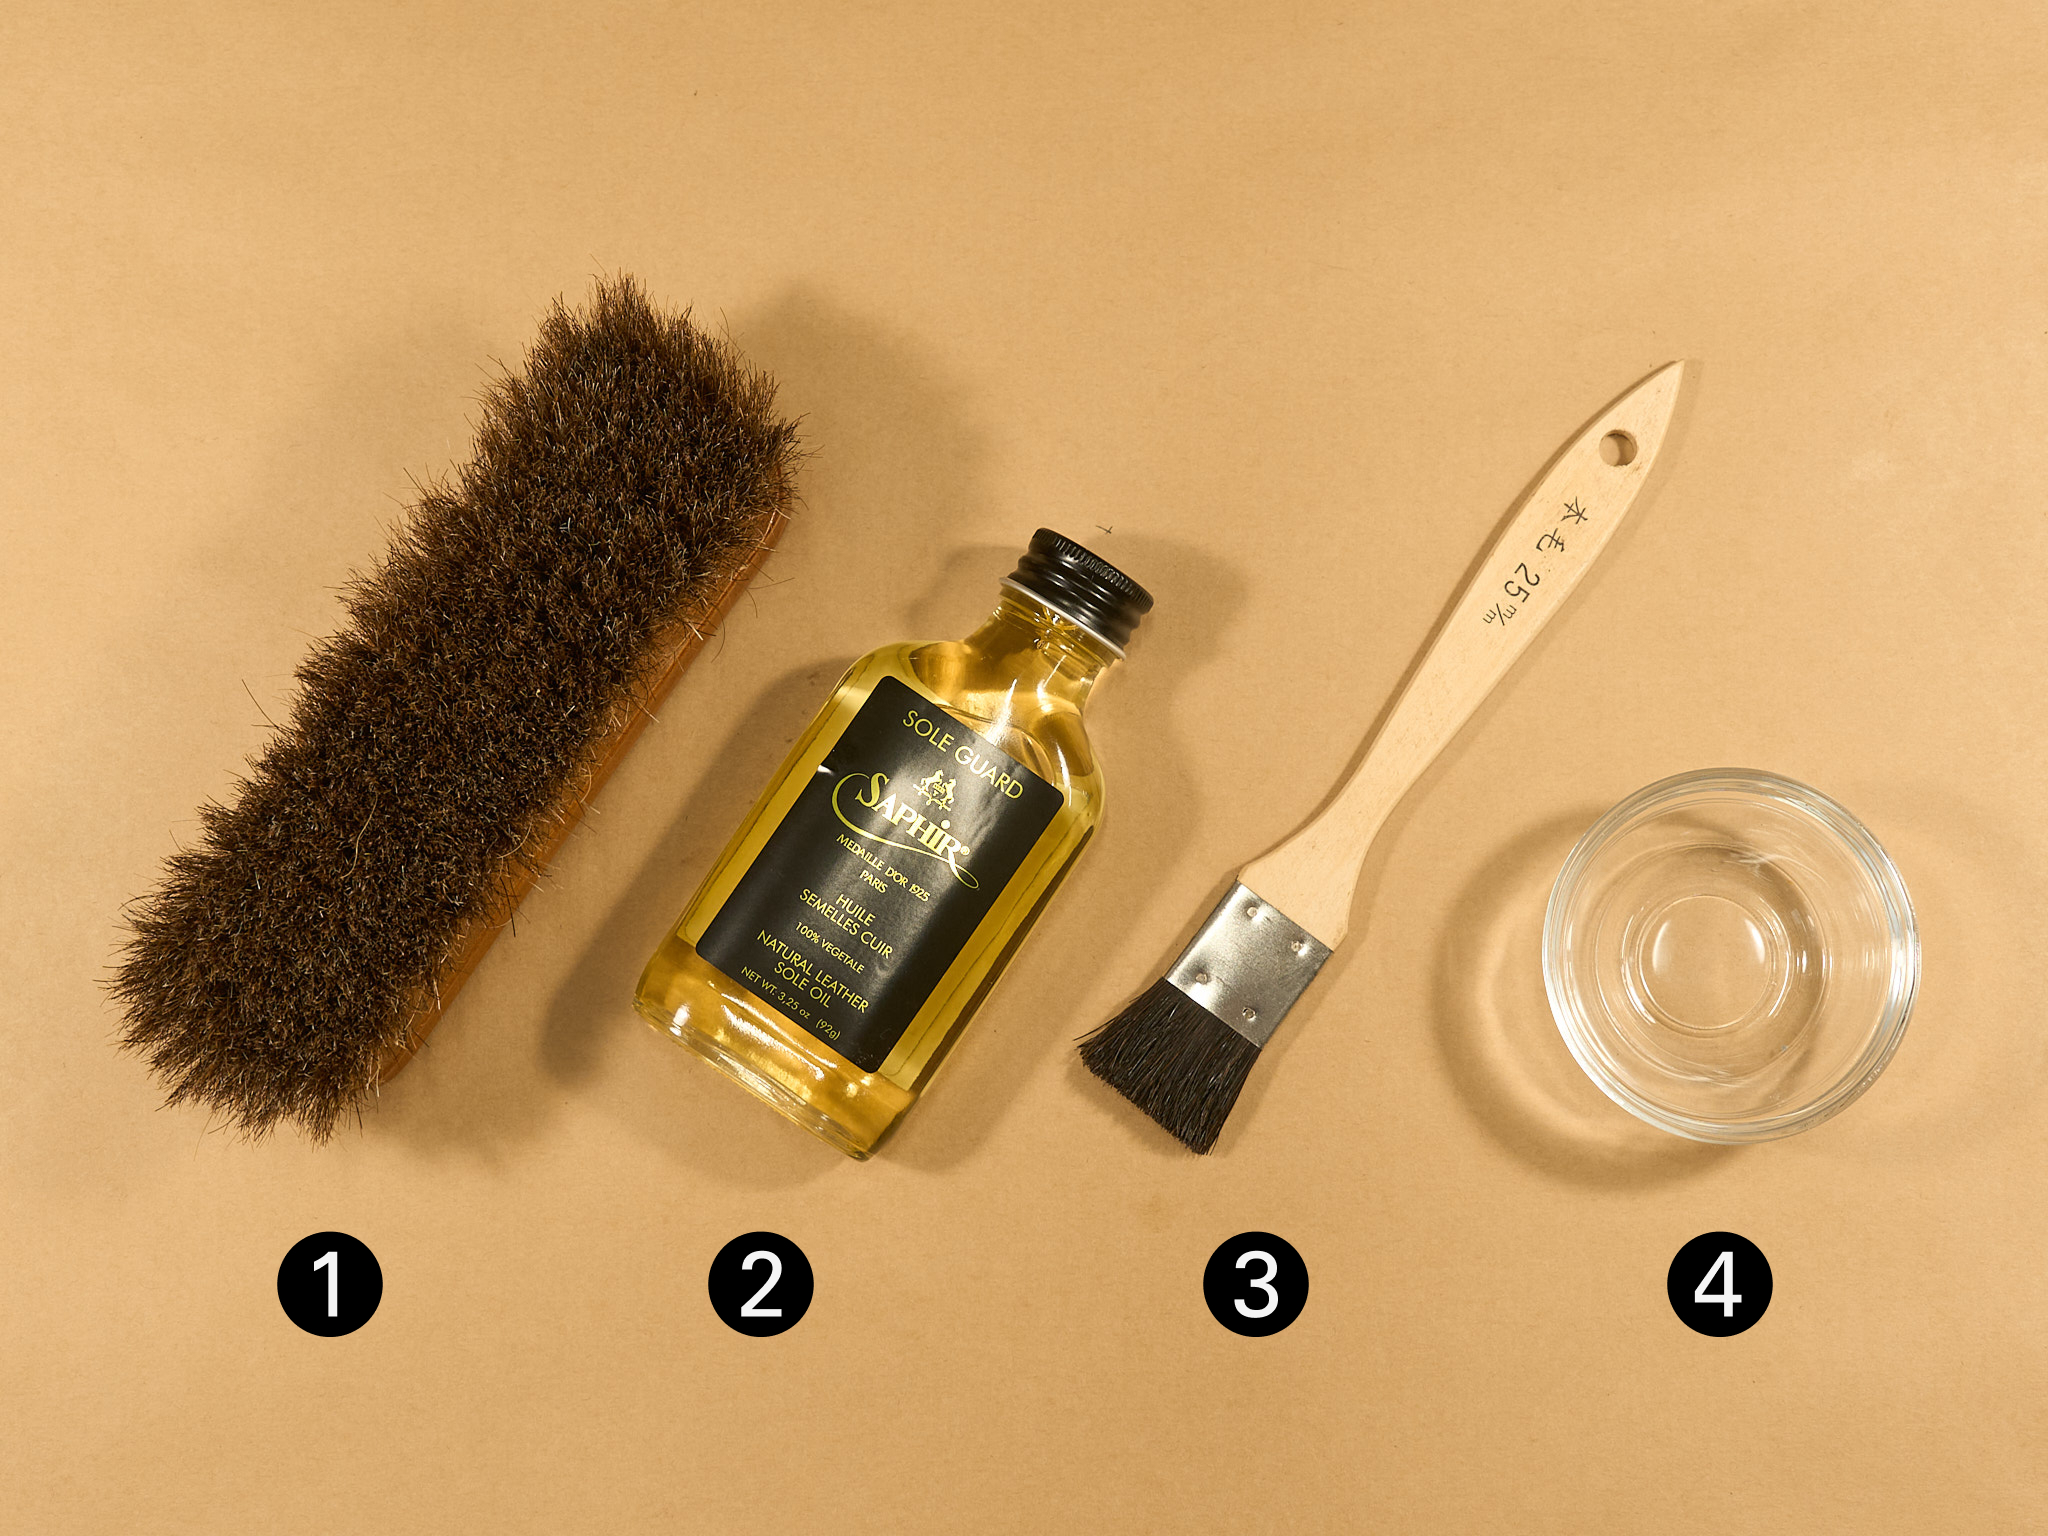
1. Horsehair Brush
Use it to remove the mud and sand from the sole.
You may use the same horsehair brush as the one used for the upper. But the sole gets far dirtier, so I recommend keeping a separate brush just for the soles.
2. Sole Conditioner
Use it to feed oil into the sole.
In this article, I'm using Saphir Sole Guard.
3. Handled Brush
Use it to spread the sole conditioner over the sole.
4. Small Dish
A dish for the sole conditioner.
Step 1: Brush Off the Dust with the Horsehair Brush
First, remove the mud and sand from the sole with the horsehair brush.
Brushing removes sand and grit on the spot, so do it before entering or outdoors.
Work on it when it's wet, or the sole conditioner won't set well. It will not work effectively.
If you've worn the shoes on a rainy day, let them dry for a day or two before you start.
Step 2: Apply the Sole Conditioner
Put the sole conditioner in the small dish.
Do not pour too much into the dish, since you may not use it all. Start with a small amount, and add more when you run low.
Next, spread the sole conditioner evenly with the handled brush.
That's it. Now let it dry completely.
The Saphir Sole Guard recommends about an hour of drying. But the time it takes to dry fully varies — it depends on how much you applied and how it soaks into the leather.
So, I'd personally recommend leaving it for half a day, until it dries completely.
How to Deal with Stains, Mold, and Scuffs
Some dirt and damage go beyond the routine care above.
In most cases, the damage reaches past the surface and into the leather. If you try to wipe only the surface, you can make things worse.
Identify the type of dirt first. Then follow the right steps for each.
When You Have Stains (Water Stains or Salt Blooms)
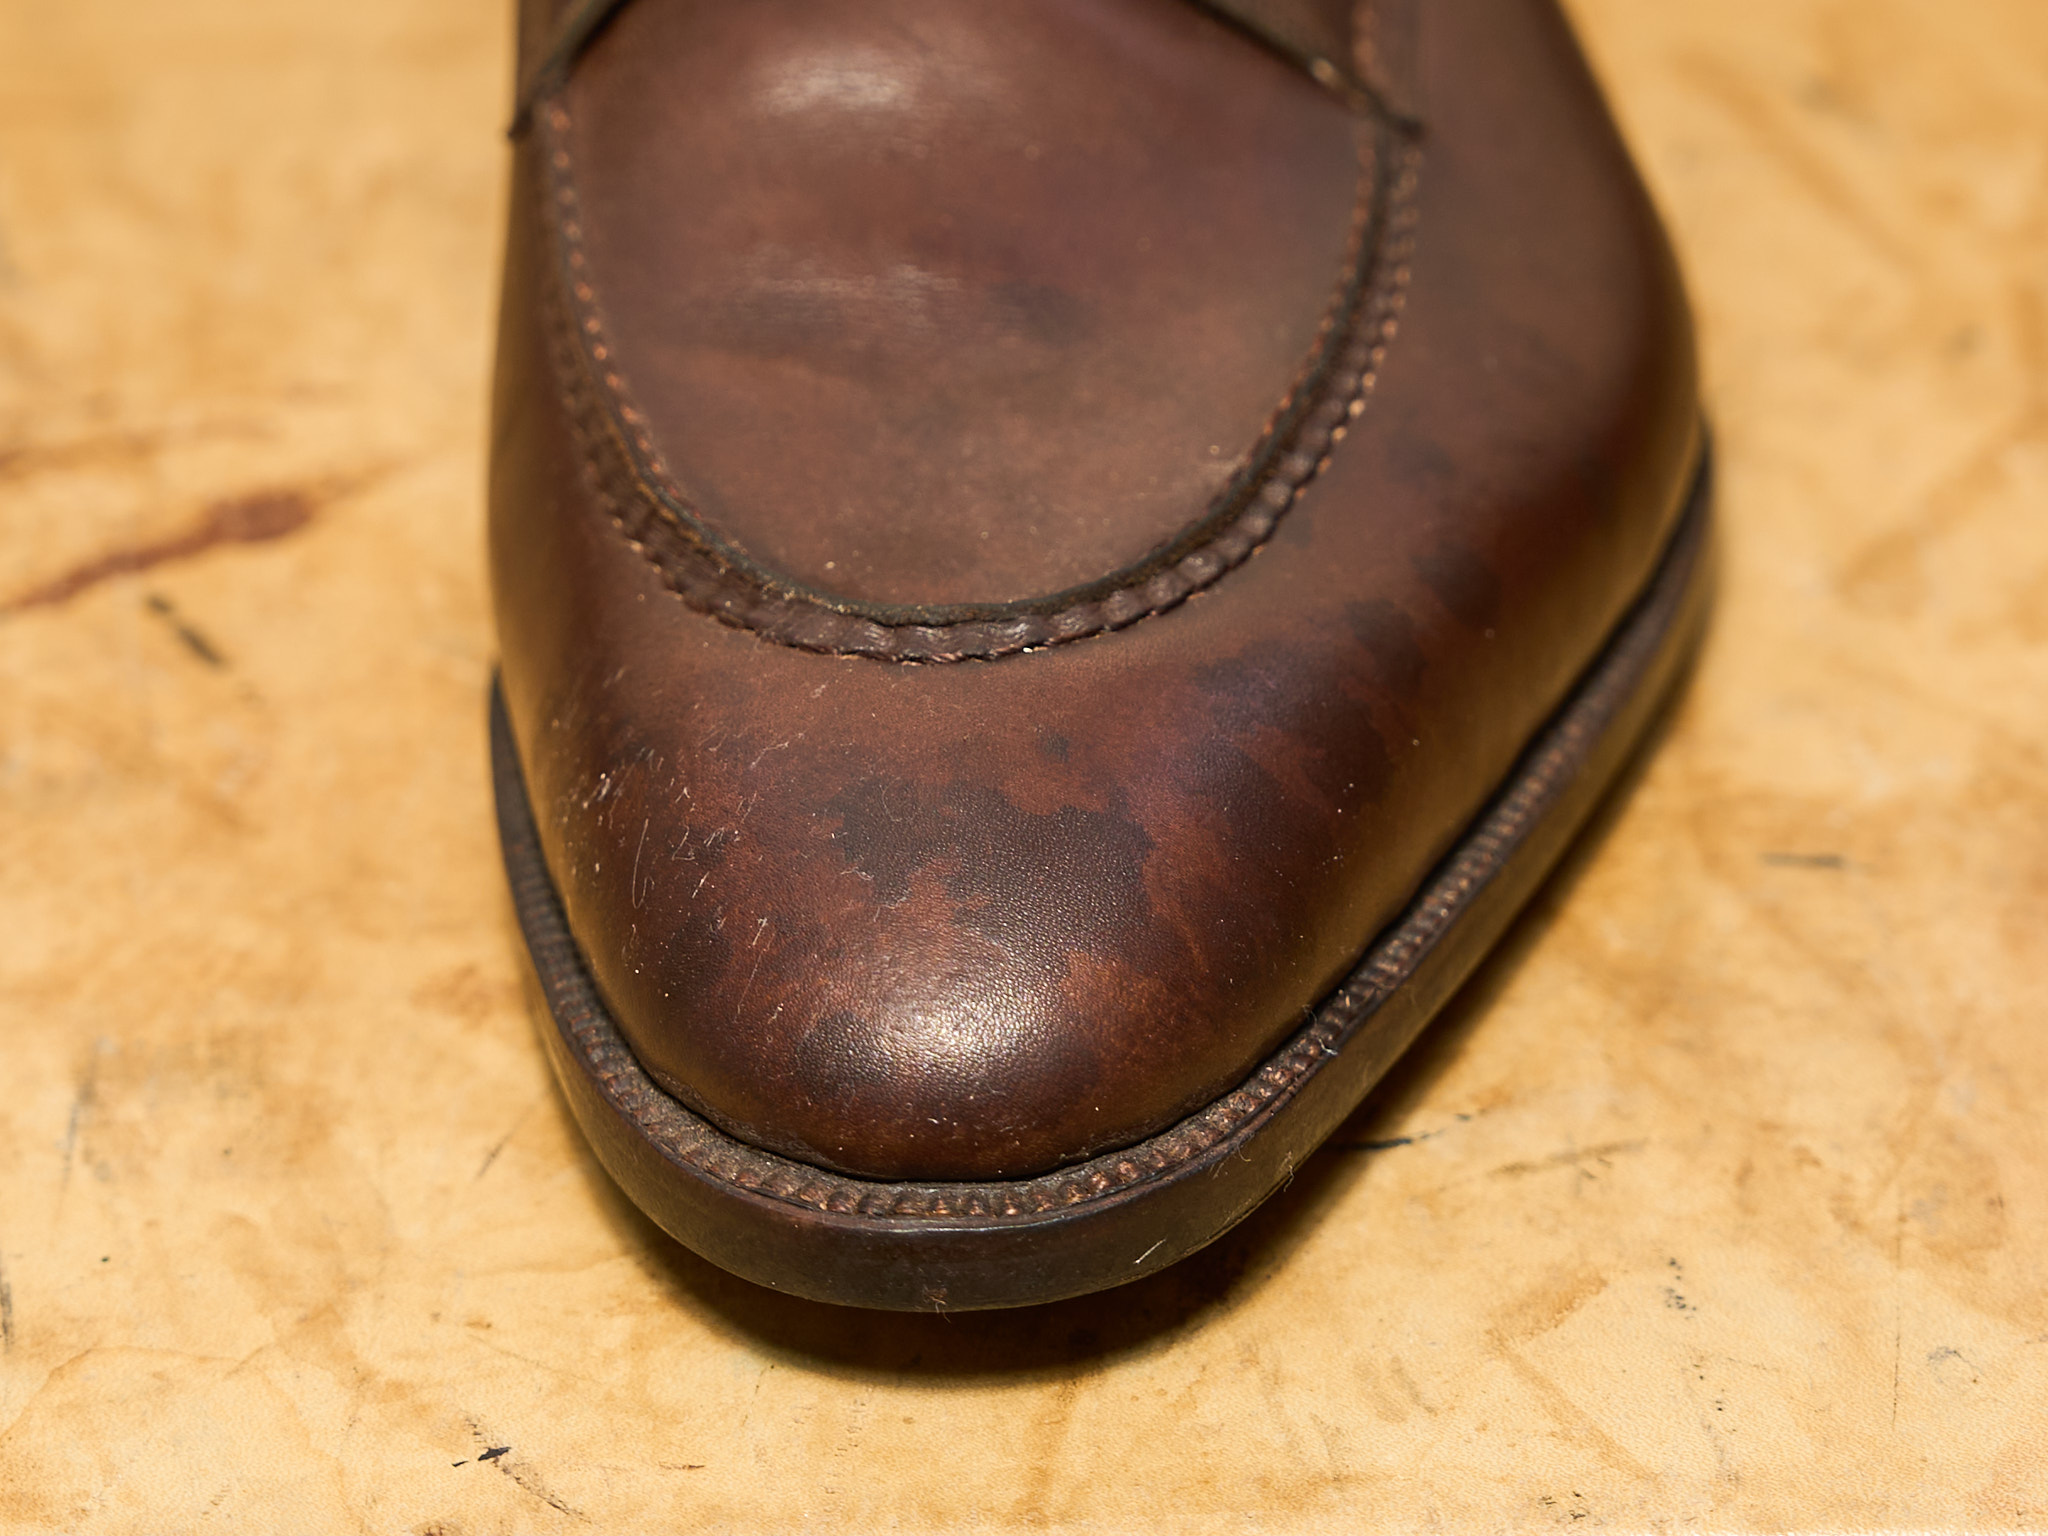
If you get caught in the rain and leave the shoes without wiping them dry, it can cause a ring-like mark to stay on the surface. These are water stains.
Leather that has soaked up sweat can cause leather bloom, too. When it gets wet again, the minerals in the sweat rise to the surface as a white mark. This is called salt bloom.
With either one, wiping at the spot alone only makes the outline of the stain stand out more. The basic approach is to dampen the whole shoe evenly, then dry it slowly.
I will cover the full steps in another article.
How to Remove and Prevent Water Stains on Leather Shoes
When Mold Has Formed
Storing shoes for too long in a humid place can allow mold to feed on the dirt and grow.
Even though you wipe it with a cloth, the mold will stay deep in the leather. It will grow back in the same spot. To fully remove it, you need a cleaner made for the job and make sure to follow the steps.
Please do not use household alcohol or vinegar. These can damage the leather fibers and cause discoloration or hardening.
I'll cover the full steps in another article.
When the Leather Is Scratched
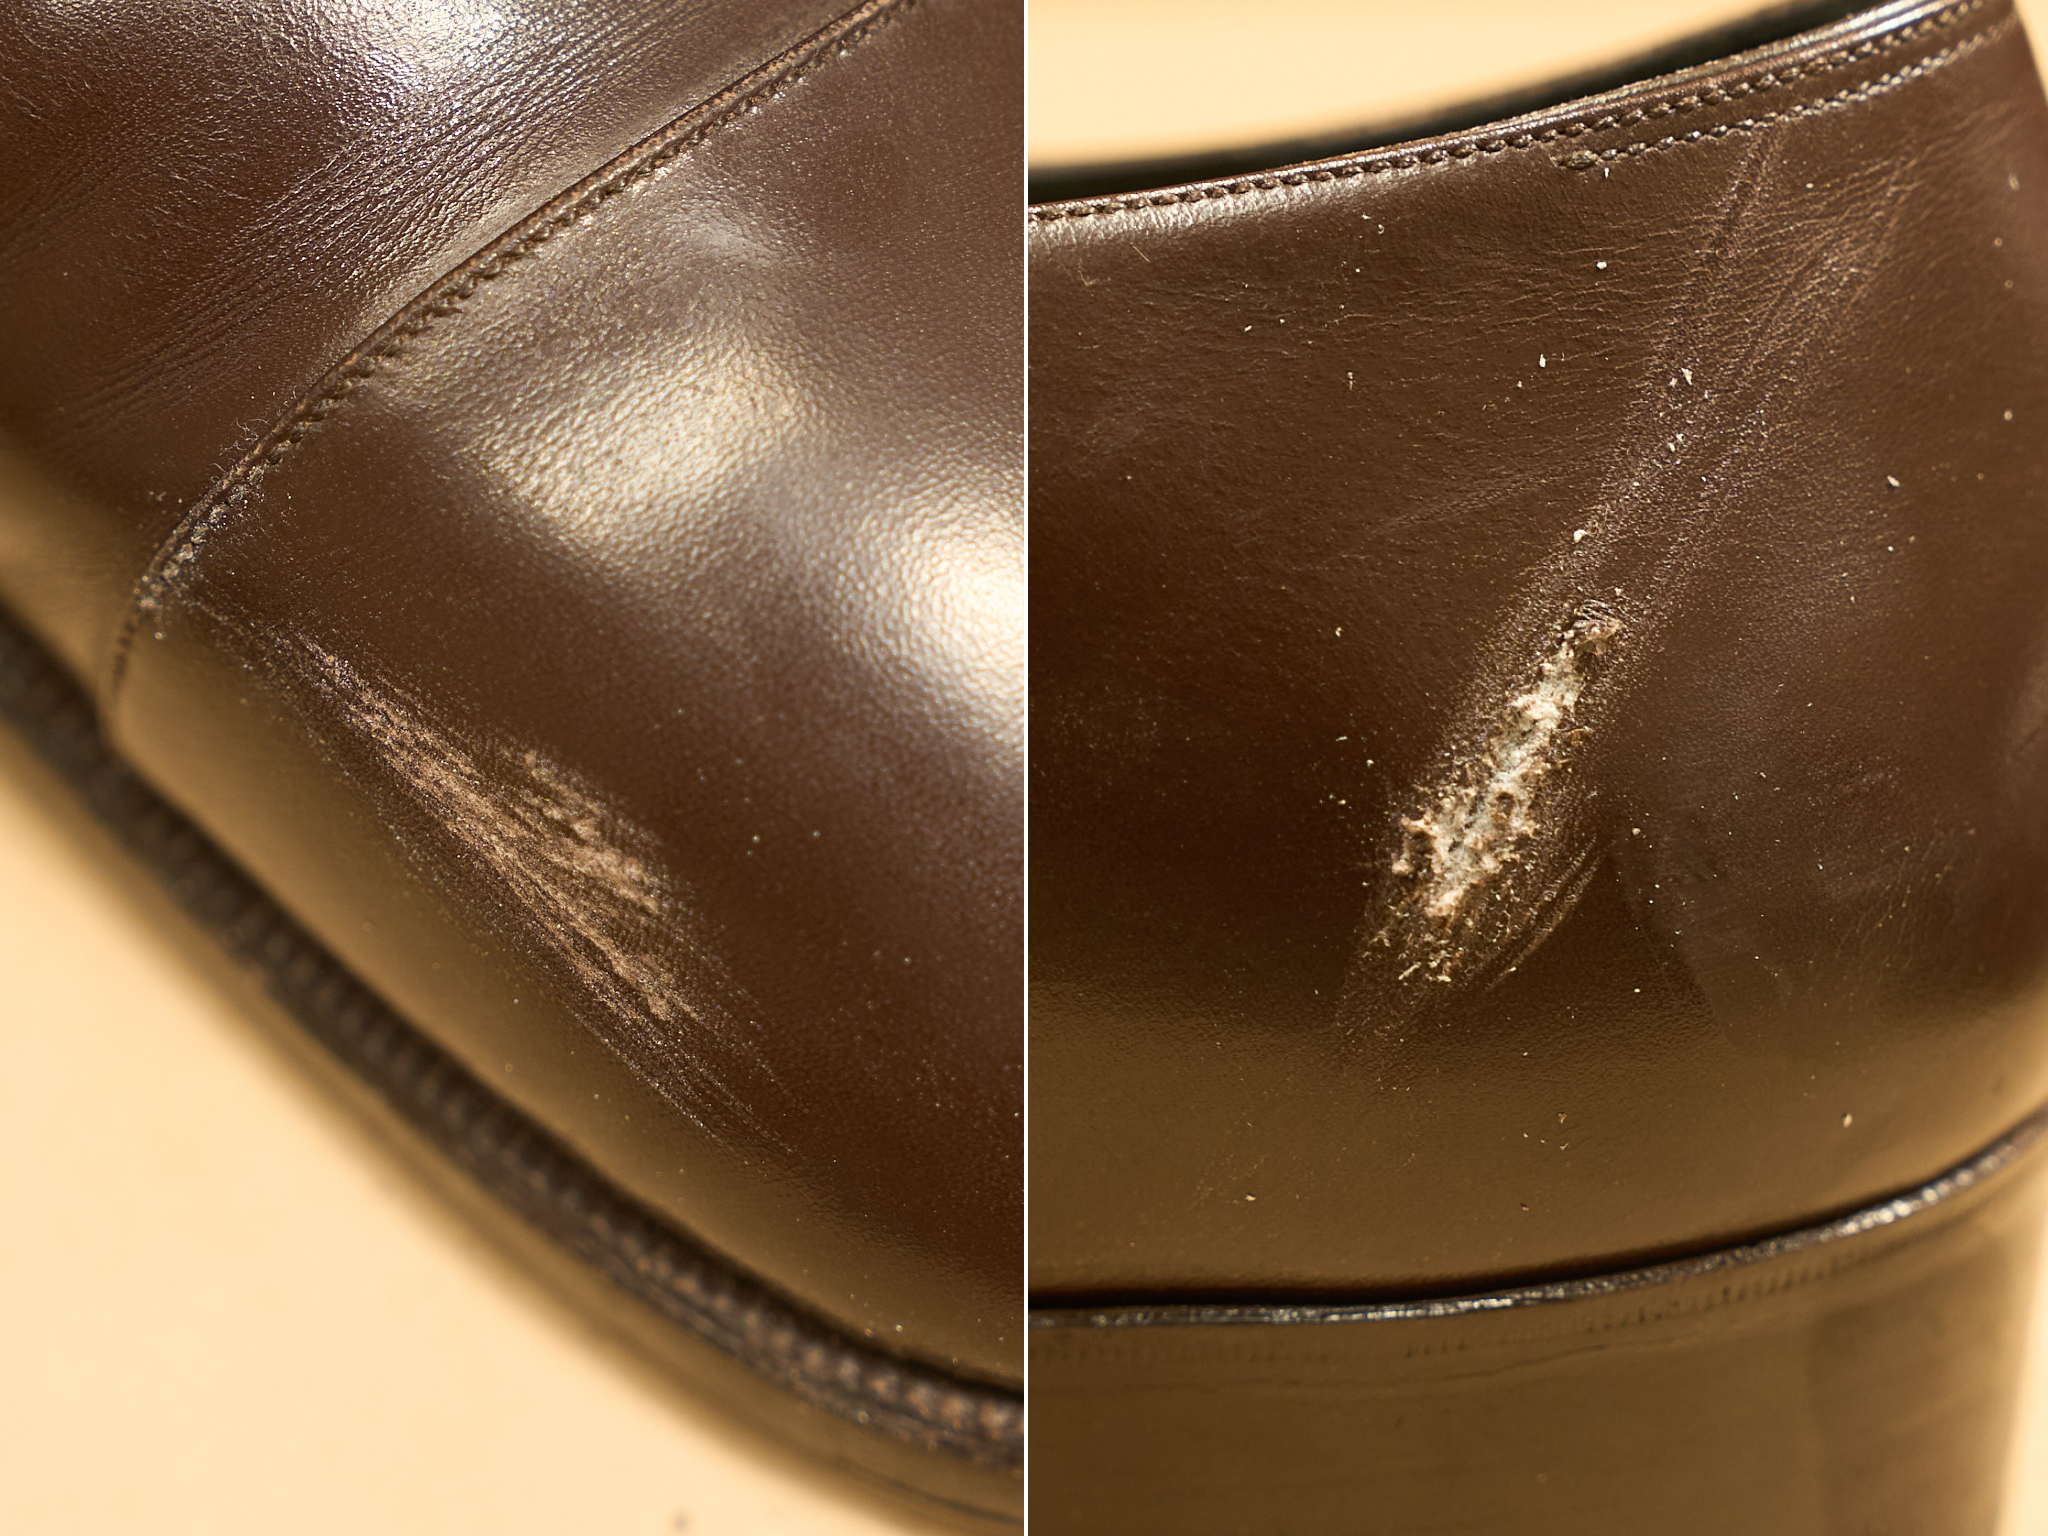
There are three types of damage, and these all depend on how deeply it runs into the grain layer of leather shoes — surface scuffs, shallow scratches, and deep scratches.
Each calls for different tools and steps. The deeper it goes, the harder it will be to handle on your own.
I have explained how to tell the scratches apart and how to fix each one in detail in another article.
How to Fix Scuffed Leather Shoes: A Shoemaker's Guide by Damage Depth
What You Should Never Use to Clean Leather Shoes
Many of the detergents and household goods on the market contain ingredients that can harm leather.
I understand that many want to use household items.
When the leather touches a product that is not for leather, the visible dirt may come off, but it can damage the shoes little by little. The surface may crack or form a patch of discoloration someday.
There is only one rule. Use tools made for leather. Here, I'll go briefly through the things people often suggest as substitutes, and why you shouldn't use them.
Dish Soap and Kitchen Detergent
The main ingredient in dish soap is a surfactant that breaks down oil and grease.
The surfactant strips the oil the leather needs. Even using it once can leave the leather dry and stiff.
People tend to say, "It's neutral, so it's gentle on leather." But neutral or not, it still breaks down oil and grease. Don't use it on leather shoes.
Vinegar, Baking Soda, and Other Acids or Alkalis
Vinegar is acidic. Baking soda is alkaline.
Leather is brought to a mildly acidic state during tanning. Touch it with a strong acid or alkali, and the structure of the fibers changes.
The dirt may look like it's gone for a moment, but damage builds within the leather. You'll see claims online that "vinegar removes mold." I don't recommend it for leather shoes.
Furniture and Floor Cleaners
Furniture and floor cleaners are made for wood and synthetic materials.
They were never meant to clean leather. Depending on the ingredients, they cause heavy discoloration or hardening.
Even a product that claims "natural ingredients," you should stay away from these products unless it were made for leather.
The Washing Machine
A washing machine cleans with excess water and friction.
Putting leather shoes straight in a washing machine will soak up too much water and swell. As they dry, they shrink and will never return to their original shape.
The adhesive comes loose—the welt warps. The lining peels away. Even if they are really dirty, never put them in the washing machine.
You do not need special skills to keep your leather shoes clean.
Properly care for each area of the shoe in specific steps. And know that the substitutes found in your home are no replacement for tools made for leather. If you understand these two things, your shoes will last five or even ten years.
Choose your tools and use specific shoe care steps. Carefully and routinely taking care of the shoe is the surest way to keep them clean, and your shoes will last for years to come.